QRvora Team·
QR Code Sticker Size: How to Print Stickers That Scan
Learn the right QR code sticker size for any scan distance, then create, print, and test your own stickers in four steps.

Wildflower honey
Scan for the farm
Getting your QR code sticker size right comes down to one rule. Divide the distance your customer will scan from by 10, then add a blank border of four modules on every side. A code read at arm's length, about 10 inches, should be 1 inch wide, which puts the finished sticker near 1.5 inches. Print it in solid black on a white, opaque material, and scan a real sample before you approve the full run.
Most failed stickers share the same story. The code looked perfect on screen, then it was printed at three quarters of an inch, trimmed tight to a die-cut edge, or stuck on clear vinyl over a dark bottle. Nobody can scan it, and the box of stickers ends up in a drawer. Size, contrast, and material are all fixed before the file leaves your computer, so a mistake costs you the whole run.
This guide gives you four steps to print your own QR code stickers, whether you use a home printer or a print shop. You will create the code, size it, build a clean file, and test the result. QRvora generates static and dynamic QR codes with print-ready exports, and the file advice below comes from what holds up on real labels.
What decides whether a QR code sticker scans
A QR code sticker scans when the camera sees enough contrast, enough detail, and enough blank space around the code. Size, material, and finish matter only because they change those three things. Get them right and almost any modern phone reads your sticker in a second.
The three things a phone camera needs
Every QR code is a grid of square dots called modules. The camera has to resolve each one, so your sticker has to supply three things:
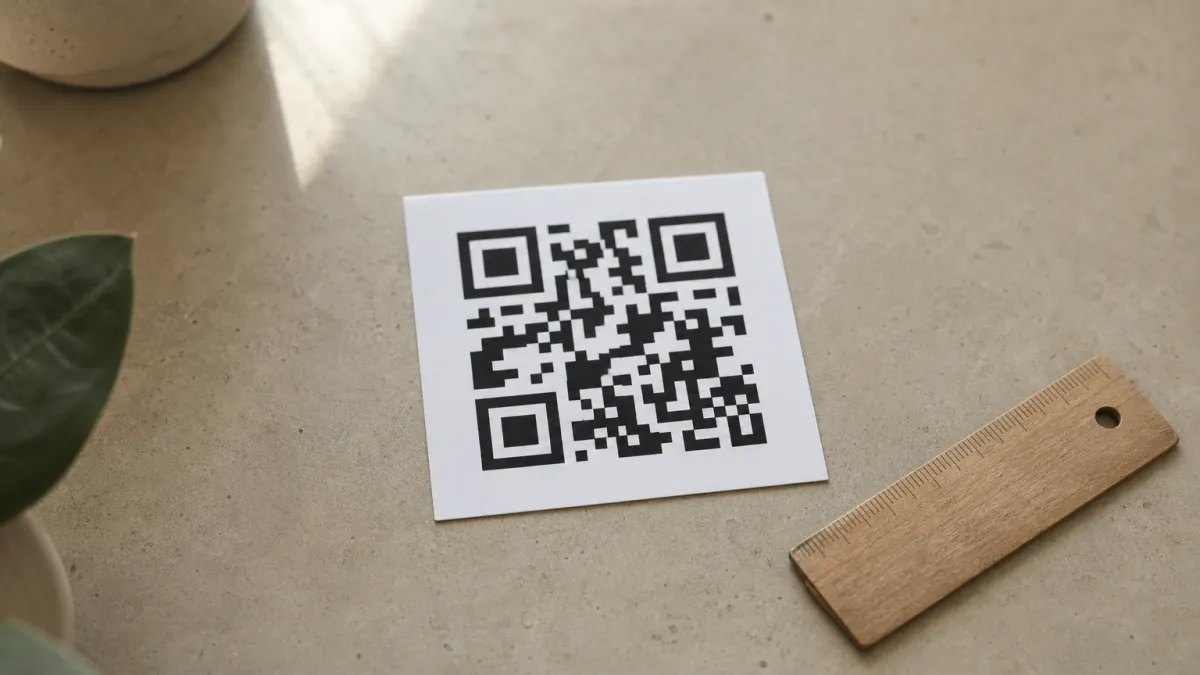
- Enough pixels per module. A small code packed with many modules gives the camera very little to work with. Size and data length pull against each other.
- Strong contrast. Dark modules on a light background work best. Gloss glare, faded ink, or a dark surface behind clear vinyl all cut the difference.
- A quiet zone. This is a blank margin at least four modules wide on all four sides. It is part of the code, not decoration.
Squeezing a border, a tagline, or a cut line into the quiet zone is the most common reason a good-looking sticker fails.
A QR code sticker is a contrast device, so protect the quiet zone and the black-on-white contrast before anything else.
Print it yourself or order from a shop
You can print your own QR code stickers on a desktop printer and label sheets when the stickers stay indoors, last a short time, and come in small numbers. Event badges, classroom tests, and a handful of shelf labels are fine this way.
A print shop earns its price when stickers face sun, water, cleaning sprays, or constant handling. It also wins when you need hundreds of identical stickers. Vinyl, lamination, die cutting, and rolls are hard to match at home. The sizing math in step 2 is the same on both routes, and step 4 covers each one.
What to have ready before you start
Gather these five things first, because each one feeds a later decision:
- The destination, or a plan to change it later.
- The surface the sticker will sit on, including any curve and the lighting.
- The distance people will scan from.
- A QR generator that exports SVG or PDF.
- Two phones, ideally one iPhone and one Android.
Write the scan distance down before anything else. It drives every number that follows.
Step 1. Create a code that survives printing
Create the code with print in mind: pick static or dynamic, keep the content short, and set the right error correction. These three choices decide how dense the pattern is, and density decides how large each module can be on your sticker.
Choose static or dynamic
A static code stores the destination directly in the pattern. It is free, needs no account, and never expires, but the printed sticker is locked to that one destination. A dynamic code stores a short redirect link, so you can change the destination after printing and see scan counts.
| Static code | Dynamic code | |
|---|---|---|
| Edit after printing | No | Yes |
| Scan tracking | No | Yes |
| Can it stop working | No | Only if the redirect lapses |
| Best for | Wi-Fi, contact cards, a permanent home page | Menus, promotions, campaigns, anything that may move |
Use static for anything permanent. Use dynamic when the link might change. Whichever provider you choose, ask how long the redirect keeps working. On QRvora, the free plan redirects for 12 months from creation, and paid plans redirect while you are subscribed plus 30 days after you cancel.
If a link might ever change, print a dynamic code, and check how long its redirect lasts before you print.
Keep the content short
Shorter content means fewer modules. A small code at version 1 is 21 modules across, and every version adds 4 more, so a version 3 code is 29 modules and a version 8 code is 49. On a 1 inch sticker, the 49-module code has modules about 40% smaller than the 29-module one.
Long tracking URLs with several parameters push codes into the dense range. Trim parameters, or use a short dynamic link that carries the long address for you. Test the printed result at your real size either way.
Set error correction for the surface
Error correction lets a code survive damage. The four levels recover roughly 7% (L), 15% (M), 25% (Q), and 30% (H) of the code. Higher levels add modules, so you pay in density.
Level M suits a plain code on a clean, flat sticker. Choose Q or H when you plan to place a logo in the center, or when the sticker will live on a surface that scuffs. A higher level makes the pattern denser, so size the sticker with that denser pattern in mind.
Step 2. Pick the QR code sticker size
Make the code about one tenth as wide as the scanning distance, then add the quiet zone on every side to get the sticker size. This works for a business card sticker and for a storefront window alike, because the rule scales.
Match code width to scan distance
The QR code size chart below assumes a 29-module code (version 3), which covers most short links. The sticker column includes the quiet zone, so round up to the nearest size your printer stocks.
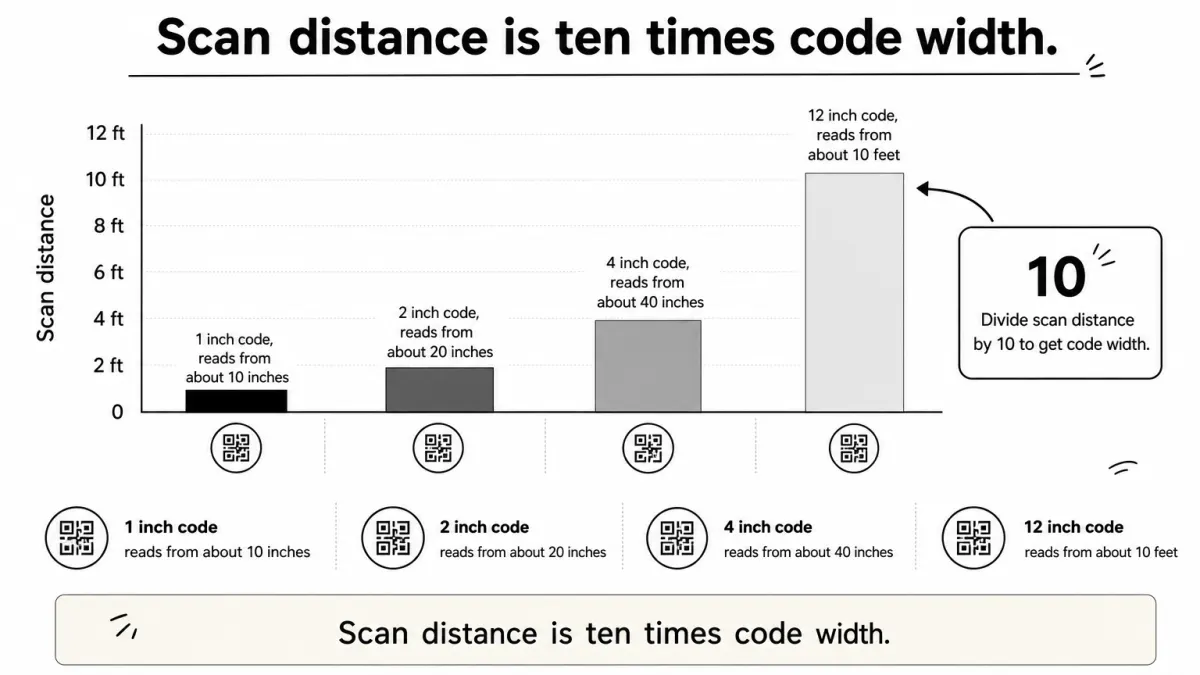
| Code width | Comfortable scan distance | Sticker size to order | Typical use |
|---|---|---|---|
| 1 in | About 10 in | 1.5 in | Business cards, product labels, jar lids |
| 2 in | About 20 in | 2.75 to 3 in | Counters, table cards, shipping boxes |
| 4 in | About 40 in | About 5.5 in | Shelf edges, doors, equipment panels |
| 12 in | About 10 ft | About 15 in | Storefront glass, van panels |
So, do QR codes need to be a certain size? Yes. For handheld scanning, 1 inch is the practical minimum. Below that, each module shrinks too far for a camera to separate cleanly.
Divide the scan distance by 10 to get the code width, then add the quiet zone to get the sticker width.
Work out your sticker size
Sticker sizing is arithmetic. Follow these steps:
- Code width = scan distance ÷ 10.
- Quiet zone = code width ÷ module count × 4.
- Sticker width = code width + 2 × quiet zone, plus any frame or cut margin outside it.
- Round up to the nearest stock size.
Take a table card scanned from 20 inches. The code is 2 inches wide. With 29 modules, each module is about 0.07 inch, so the quiet zone is about 0.28 inch per side. The sticker needs roughly 2.55 inches, so order 2.75 or 3 inches.
Account for angles and curves
Measure the real distance, not the ideal one. A sticker on a low shelf or high wall gets scanned from farther and at a worse angle, so size up. Curves cause a second problem. Wrapping a code around a small jar bends the modules away from the lens, so put it on the flattest panel and shrink the code until it sits within a gentle arc.
Step 3. Design and export the sticker file
Design the sticker for contrast first and branding second, then export a vector file at the exact finished size. Most print problems that look like printer faults start in this step, because a stretched or enlarged file blurs the module edges.
Keep contrast high and branding light
Use dark modules on a light background. Avoid inverted codes with light modules on a dark field, because many scanners struggle with them in dim rooms. Colors and gradients are fine as long as the darkest part of the code stays dark against its background. Dot patterns and rounded corners look good, but test the printed result, because soft shapes can lose definition at small sizes.
A logo can sit in the center if you set error correction to Q or H. Keep it small and never let it touch the three corner squares, which the scanner uses to find and orient the code. A call-to-action frame such as "Scan me" helps people know what to do, but it must sit outside the quiet zone, not inside it. QRvora lets you add logos, colors, corner styles, and frames before you download.
A branded code is only as good as its contrast, so test every color choice on paper before you commit.
Export vector and lock the size
Export SVG or PDF whenever you can. Vector files scale without softening, so module edges stay hard at any size. Download the PNG or JPG only for quick uses like documents.
To resize a QR code for printing, follow this order:
- Export the SVG or PDF at the largest size you need.
- Place it in your layout at the exact finished width from step 2.
- Lock the aspect ratio so the code stays perfectly square.
- Keep the quiet zone clear of text, borders, and cut lines.
- Print at 100% or "actual size," never "fit to page."
If you only have a raster file, generate a new one at the finished size at 300 dpi or higher. Never enlarge an existing PNG, because the soft gray edges it creates confuse the decoder. QRvora also offers a one-page print sheet with poster, table-tent, and sticker sizes, which saves layout work.
Step 4. Print the sticker and test it
Print on the right material, then scan the finished sticker on its real surface before you approve a full run. The test is the only step that checks the actual object, because lamination, curvature, and the surface underneath do not exist on your monitor.
Print your own QR code stickers at home
Home printing works for indoor stickers. Buy printable label sheets that match your printer type, inkjet or laser, and set the print dialog to 100% scale and the highest quality. Print one test sheet on plain paper first and scan it. That catches a sizing mistake for the price of one page.
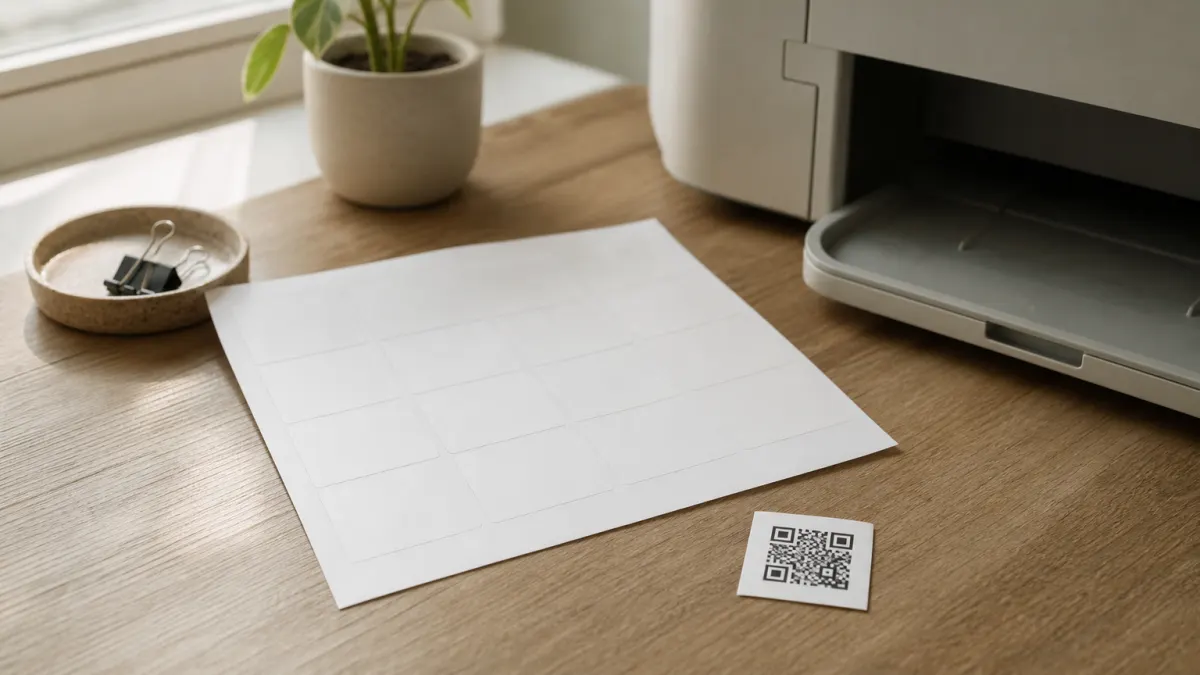
Use plain black ink, and let it dry fully before handling. Home paper labels fade, curl, and warp when wet or cleaned, so treat them as short-term. Leave a little room around each sticker when you cut so the quiet zone stays intact.
Order from a print shop
Send the vector file at finished size and ask for solid black on a white, opaque material. Pick the stock by where the sticker will live:
| Material | Best for | Watch out for |
|---|---|---|
| White vinyl | Wet, sunny, or cleaned surfaces | Gloss glare under overhead lights, so ask for matte |
| Paper | Indoor, short-term use | Warps when wet |
| Clear | Light, flat surfaces only | The surface becomes your background, so add white ink behind the code |
| Die-cut shape | Branded outlines | The quiet zone has to sit inside the shape |
| Roll | Large runs of one code | Order a proof first |
Choose white vinyl and a matte finish for anything wet, sunny, or scrubbed, and skip clear stock unless white ink sits behind the code.
Test before you approve the run
Apply one production sticker, not a screen mock-up, and check each of these:
- It scans from the distance you planned for, at the angle people will use.
- It scans in the real lighting, including overhead glare and daylight.
- It scans on both an iPhone and an Android phone.
- It still scans after lamination and after you apply it to the surface.
- The destination opens quickly and works on a phone.
If any check fails, fix the cause before printing more. Usually the answer is a larger code, a shorter link, or a matte finish.
Size it, test it, then print the batch
The method is short. Pick static or dynamic, keep the content short, size the code at one tenth of the scan distance, protect the quiet zone, export a vector file, and scan a real sample on two phones. Every failed sticker skips one of those steps.
When you are ready to build the code, create your QR code with the QRvora QR code generator. You can start with a free static code, add your logo and colors, and download an SVG or PDF sized for your stickers. Choose a dynamic code when you want to edit the destination after printing.
Print a code you can still edit next year
1 dynamic QR code free, with scan analytics. Active for 12 months on the free plan, and editable the whole time. No card needed.
Create a free QR code